After having created your new project, you’ll be taken to the Customizer.
The Customizer is an interface where you can adjust settings for all the elements you add to the website pages.
General Presentation of the Customizer
It includes a menu on the left-hand, where you can navigate to the category corresponding to a particular section in a web page.
Thus, you’ll have options for:
- Header sections
- Content sections
- Footer sections
- General settings
- Menus
- Widgets
The left-hand menu includes a list of elements that can be customized for the pages of your website.
Each of these categories has its own subcategories that help you customize in detail the items of a web page.
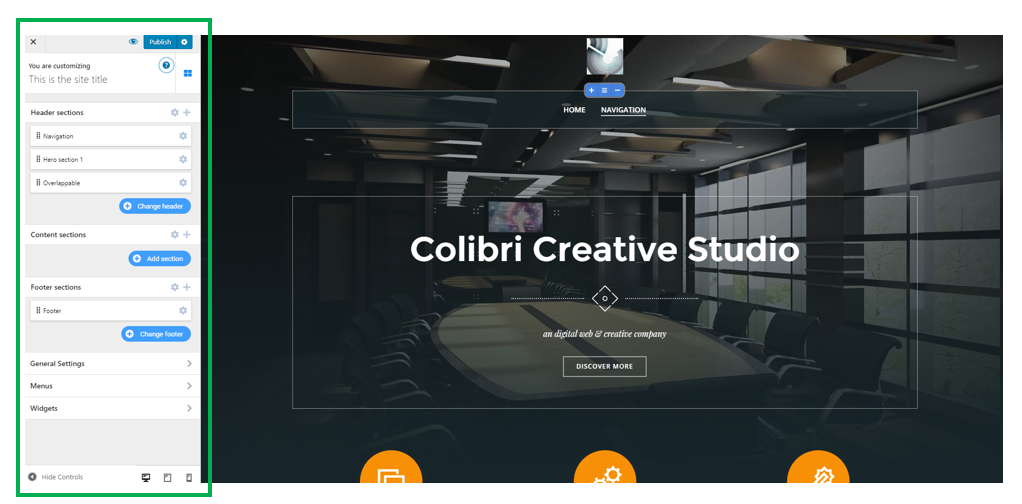
In the right-hand of the Customizer, you have a preview of the page as it’ll look like to visitors. This is the canvas. The actual canvas is kept neat and clean, and the editing options show up only when you actually hover over a particular element you want to modify.
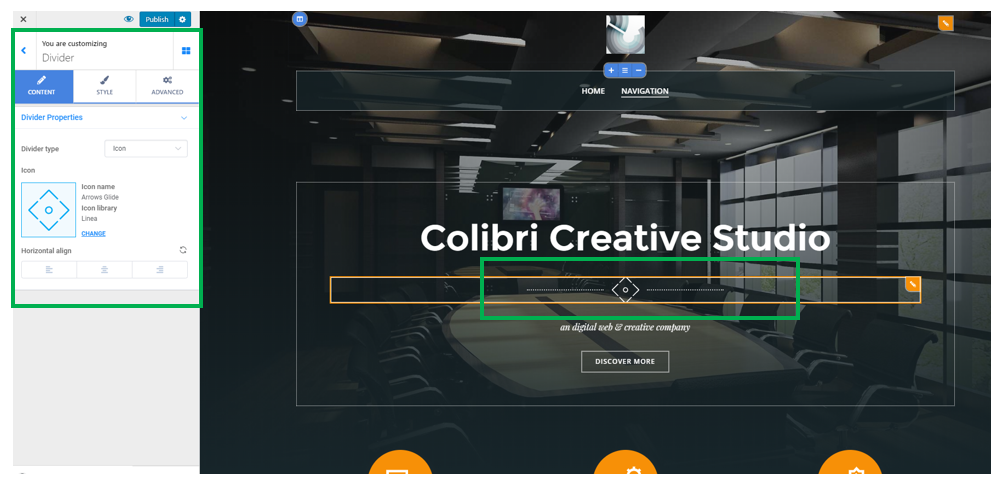
By placing the cursor inside one element of the page, you’ll be able to simply navigate to the Settings section for that element.
Click inside an element and open its Settings section in the left-hand menu of the Customizer.
Then, start modifying settings to your liking.
With Colibri, you have 2 possibilities:
- To add blank sections to a page, and customize them from scratch
- To add predefined sections from the list of available options, and only tweak and refine them to best represent your company.
![]()
Adding Blank Sections
Click on the blue button “Add Blank Block” and insert a section where you’ll put any items you want and choose the style you want for them.
Start by choosing a structure for the new page section:
![]()
There are multiple structures you can choose from, as you can see in the screenshot above. This list helps you get a grasp of how the section will look like, how it will integrate in the page, and how the content of the section will match the chosen structure.
E.g. For choosing a 3 column-structure, you’ll have 3 placeholders where you can add any components you want.
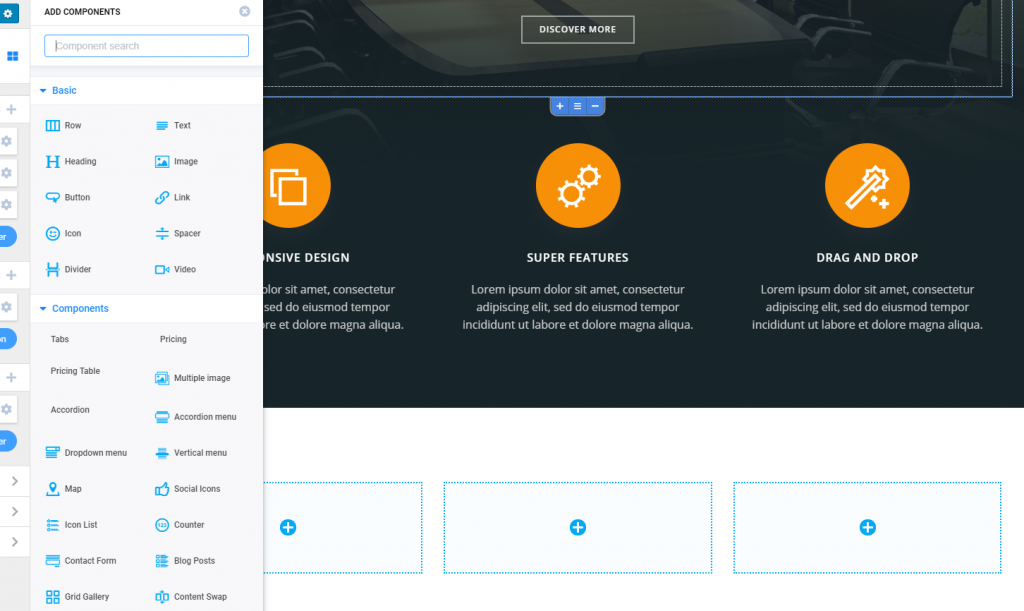
Add content to blank section
Click on the + sign inside of the column you want to add content to, and the list of components will open. Drag-and-drop the needed component to the placeholder for the column you want to customize.
![]()
Reordering columns
After having added content to the columns, you can simply change the order of the columns, with drag-and-drop.
Removing section
In the top right area of the section, when hovering over with the mouse, you’ll find a Delete button you can use in case you want to completely remove the section from the page.
Remove column in the section
If you want to remove just one column in the new section, you should use the top left button that appears when you hover your mouse over that column. Press the Delete button and that’s it.
Adding new column
If you want to make modifications to the layout itself, and add a new column, hover your mouse over the section and a group of 3 buttons will appear in the upper part of the section. Click on the + sign to add a new column.

Adding Predefined Sections
Click on the Add Predefined Section button, and you’ll open the list of ready-made sections you can choose from.
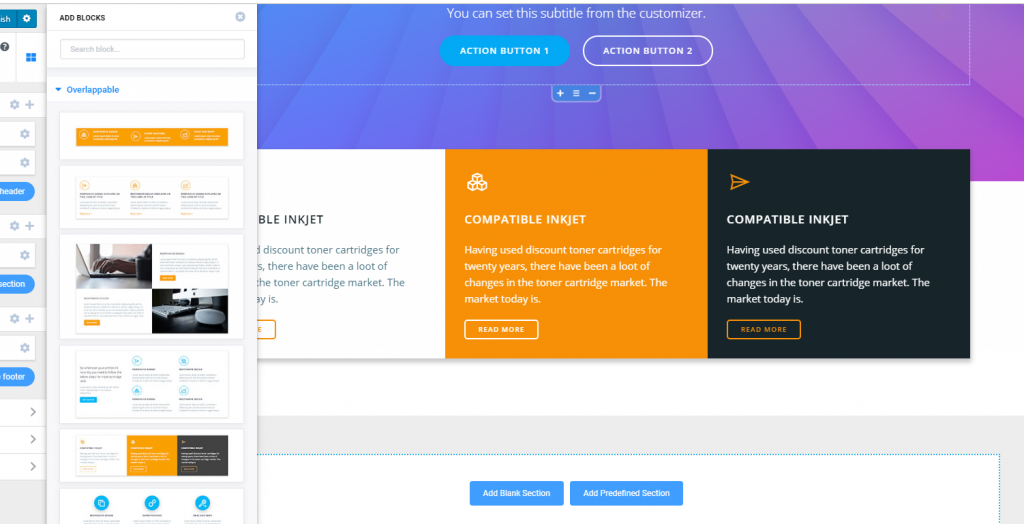
Then, start customizing them, as follows:
Options for page sections
If you hover over one section in the page, two buttons will appear in the upper right corner of that section: a cog icon and a plus icon.
Clicking on the cog icon, you’ll expand the following list of options:
- Change background (from here, you set the specific background for that section in the page. It can be set to image/gradient/video/slideshow)
- Edit section layout (from here, you can make changes to the structure and style of the selected section in the page)
- Add items in a list (this option is valid for sections that contain lists; from here, you can add new items in the current list)
- Decide on the number of items per row (this option is also valid for sections that contain lists; from here, you can set up the number of items that will be displayed in a row: 1, 2, 3, 4, 6 items per row)
- Reorder items (you’ll open a section in the left-hand menu of the Customizer, where you can rearrange items by drag-and-drop)
- Add section (it adds a new section)
- Duplicate section (you create a copy of that section and include it in the page)
- Delete section (you remove that section from the page).
Clicking on the plus icon, you’ll expand the list of components you can add to the section:
- Basic components
- Advanced components
- Site Data components
Options for elements in a page section
By hovering over one element in the selected page section, two buttons will appear at the right and left corners of that element: a pencil icon and a button for columns.
By clicking on the pencil icon, you’ll expand a list of options that are specific for the element you’ve started customizing.
These might be:
e.g. For a menu
- Edit drop-down menu (the options corresponding to drop-down menus will open in the left-hand menu of the Customizer)
- Duplicate (you’ll create a copy of the element and include it in the page; with drag-and-drop, you’ll be able to move the copy of the menu to a different place of your choice, in the page)
- Copy style (use this button for copying the menu style, so you can apply it to a different item in the page)
- Paste style (use this button to apply a style you’ve copied from another element in the page – to the element you’re editing)
- Delete (you completely remove the item from the page)
e.g. For a heading
- Edit heading (you open the corresponding section in the Customizer, where you can make modifications to the content and style of the heading)
- Duplicate heading (you create a copy of the heading and insert it into the webpage)
- Copy style (you copy the style you’ve set for this heading, to apply it to another element in the page)
- Paste style (you paste the style you’ve copied from a different element, to apply it to the heading you’re editing)
- Delete (you completely remove the heading)
e.g. For a text
- Edit text (you have to adjust settings for the content and style of the text)
- Duplicate text (you’ll create a copy of the text, in the page)
- Copy style (you copy the style of the text, with the purpose of applying it to another item in the page)
- Paste style (you apply a style you’ve copied from a different item in the page – to the text you’re editing)
- Delete (you completely remove the text).
By clicking on the button for columns, you’ll expand the options for:
- Editing column (you’ll open the panel with settings for that column)
- Adding new column (you’ll add a new column in the list)
- Duplicating column (you’ll add a new column that’s identical to the one you wanted to copy)
- Copying style (you copy the style of the item, to apply it to another item in the page)
- Pasting style (you paste the style you’ve copied from a different item in the page)
- Deleting (you delete the respective item from the page).
Additional options for elements in a page section
If you hover over one element in a page section, 3 additional buttons will appear:
A + sign for adding a new column
A columns button
A – sign for deleting a row.
When clicking on the columns button, you’ll find settings for the following:
- Add column (you can add a new column to the section)
- Edit row (you can customize a specific row in the section)
- Duplicate (you’ll duplicate the respective element in the section)
- Add row above or Items per row (you’ll add a new row above the current elements in the section, or you set the number of items per row)
- Add row below or reorder items (you’ll add a new row below the current elements in the section, or you change the order of the items in the list)
- Copy style (you copy the style of the list, so you can apply it to another element in the page)
- Paste style (you paste a style you’ve copied from a different element in the page)
- Delete (you’ll delete the respective element in the section).