Menus are important for making possible users’ navigation within the website pages, and within different sections of the same page.
To create a menu, you have to first locate the place in the page where you want to insert the menu.
We’ll show you how to create a menu that will be placed in the Header.
First, you need to make sure there’s a navigation section in the upper part of the page. If there isn’t one, click on the + sign next to Header sections and select a navigation section from the predefined blocks.
Click on it to add it to your page.
You need to place it on top of the page. If there are previous sections added in the page, use drag-and-drop to move it in the upper part of the Header.

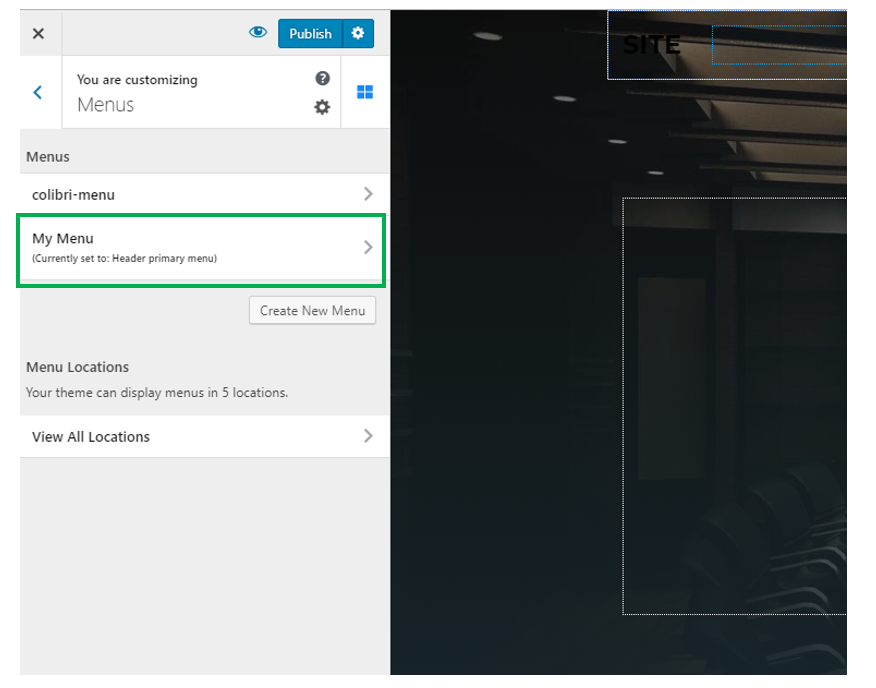
Then, in the left-hand menu of the Customizer, go to Menus.

Click on Create Menu, under Menus.
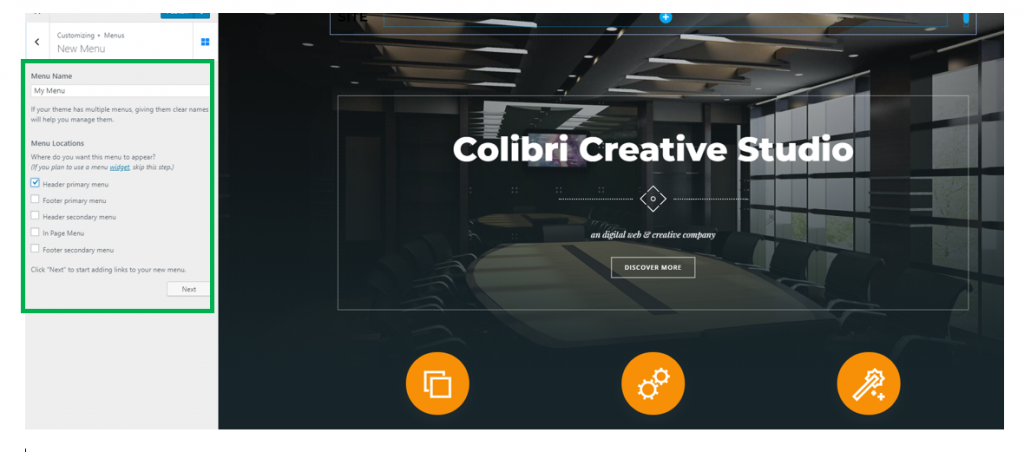
You’ll be taken to a subsection in the Customizer where you need to:
- Give a name to the menu you want to create. To easily manage menus, try to use a suggestive name for your menu.
- Choose a location for your menu (there are 5 possible locations for the menu; the most frequent case is to choose the menu as the Header Primary Menu; therefore, you’ll put it in a visible place that visitors can use for simply navigating within your pages/page sections). To select the menu as Primary Menu, check the checkbox for Header Primary Menu.
- Then, click Next.
You’ll go to the section where you can customize your newly created menu.
To see how you can add sections to the menu, check the article on How to Add Sections to the Menu.