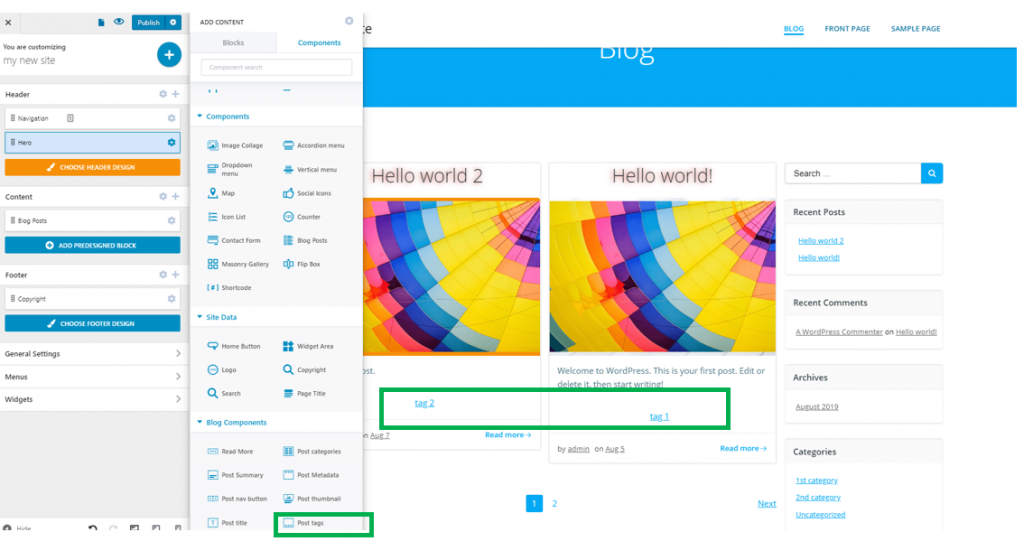
This component allows you to add tags to the blog post, in the blog homepage, for example. That is why it is best paired with a blog post component, and it should be placed under the post title, post thumbnail.
To insert a post tag component next to an article, please make sure you have the components list open in Customizer. In the subcategory named Blog Components, find the Post Tag component. Use drag-and-drop to insert it next to the article you want to show tags for.

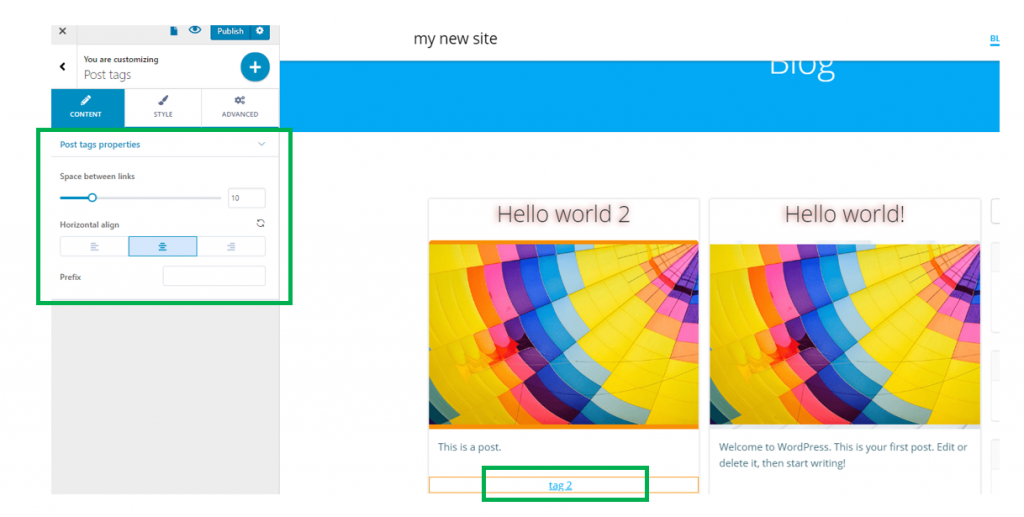
To start customizing the Post Tags, make sure you have the corresponding settings category open in Customizer.
Content
Space between links – as tags have links placed on them, this option refers to the space set between links, hence between tags associated to a blog post.
Horizontal alignment – tags can be aligned to the left, at the center or to the right, depending on your preferences.

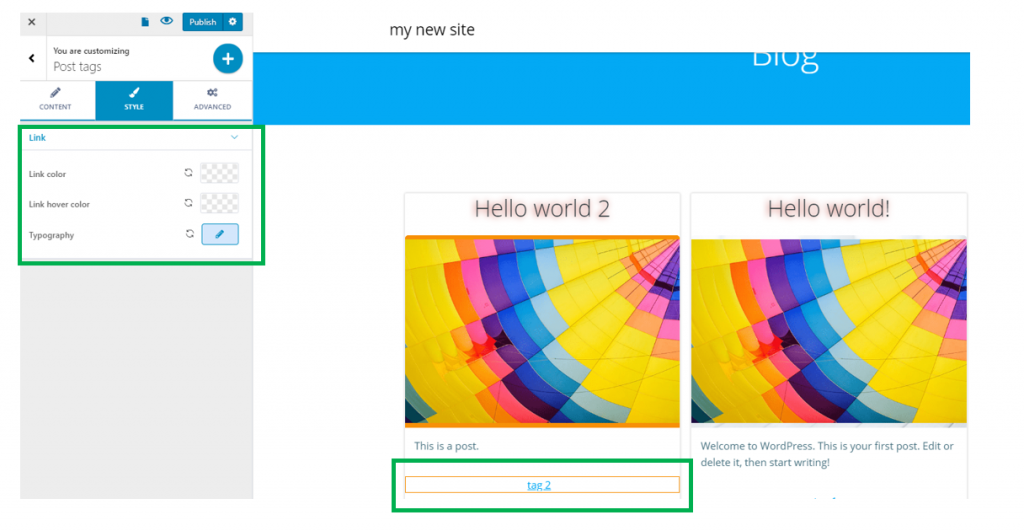
Style
Link color – from here, you can choose the color of the link, from the color picker.
Link hover color – from here, you can choose the color of the link, as it appears when users hover their mouse over the respective tags.
Typography – click on the pencil icon next to Typography, to open the panel with customization options for the text of the tags: choose a font family, chose the font weight and font dimensions, turn the text to uppercase or lowercase, or capitalize them, choose a style of the text, etc.
