For the menu to be well integrated into a page, you might need to make additional customizations related to the menu style.
Change the color of the text corresponding to the menu items, in normal state
To change the default color of the items in the menu, click inside the menu. This will open, in Customizer, the subsection for settings corresponding to the element you want to change.
Press the second tab, for Style, and start making the modifications:
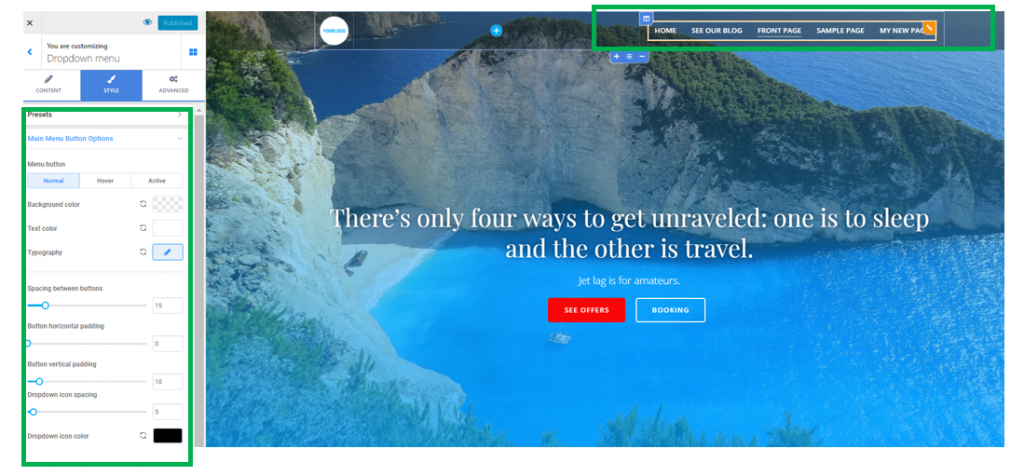
You can make the following changes:
- Set the color of the background for the menu, by using the color picker
- Change the color of the text for the menu items, by using the color picker
- Select an appropriate typography for the menu item (font family, the weight of the font, the dimensions of the font for the text, set the text to uppercase/lowercase, etc, underline the items, etc)
- Define the height of the text line, by selecting a value on the slider
- Customize the spacing between the letters of the items text
Further customizations:
- You can adjust the spacing between the items composing the menu
- You can determine the surface onto which the menu items can deploy, in the navigation bar
Below is an example of menu for which we changed the items color and increased the distance between the menu items:
Change the color of the text corresponding to the menu items, on hover and for the active item
The options regarding the style of the menu items are the same as for the menu items in normal state, only you give different values for them.
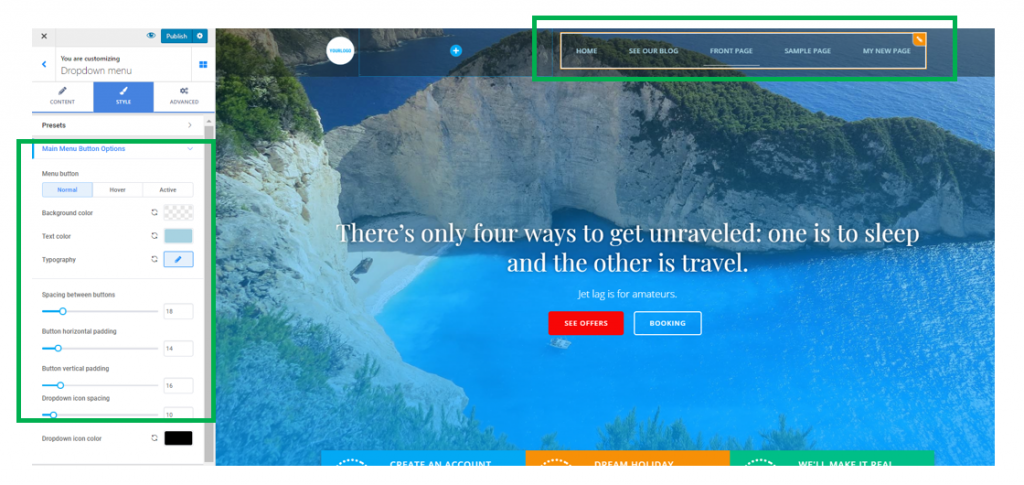
Under Main Menu Button Options, click on the second tab (Hover) to customize the menu items as they appear when users hover their mouse over the respective items.
You can make the following changes:
- Set the color of the background for the menu, by using the color picker
- Change the color of the text for the menu items, by using the color picker
- Select an appropriate typography for the menu item (font family, the weight of the font, the dimensions of the font for the text, set the text to uppercase/lowercase, etc, underline the items, customize the spacing between the letters of the items text)
Further customizations:
- You can adjust the spacing between the items composing the menu
- You can determine the surface onto which the menu items can deploy, in the navigation bar
Also, under Main Menu Button Options, click on the third tab (Active) to customize the menu items as they appear when they become active items – that is, when users are seeing the page/page section corresponding to the menu item they have clicked on.
You can make the following changes:
- Set the color of the background for the menu, by using the color picker
- Change the color of the text for the menu items, by using the color picker
- Select an appropriate typography for the menu item (font family, the weight of the font, the dimensions of the font for the text, set the text to uppercase/lowercase, etc, underline the items, customize the spacing between the letters of the items text)
Further customizations:
- You can adjust the spacing between the items composing the menu
- You can determine the surface onto which the menu items can deploy, in the navigation bar
Change the placement of the menu items
To change the positioning of the menu items in the navigation bar, go to Header Sections -> Navigation -> Content -> Layout structure.
Here, you have a preview for 5 different arrangements of the menu items in the navigation bar:
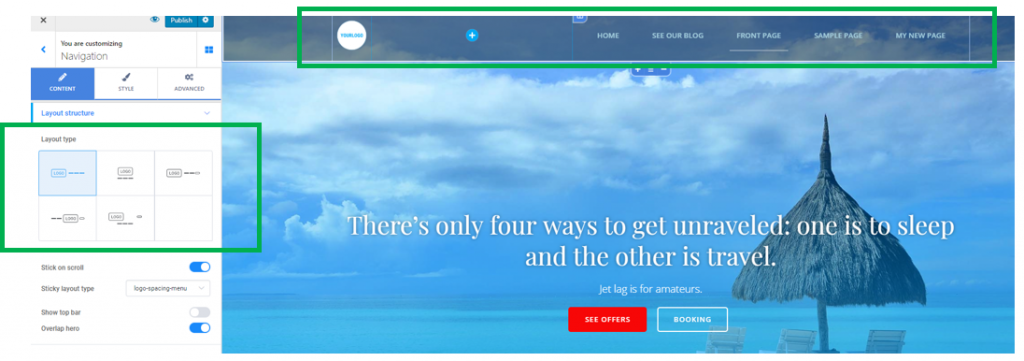
You can choose to have:
- Logo on left, navigation on right
- Logo above menu
- Logo on left, menu on right, Call-to-Action button after the menu
- Menu on left, Logo on right, Call-to-Action button after the logo
- Menu below logo and Call-to-Action button