To give a more stylish look to the pages of your website, you can apply some effects, as follows:
Transition duration
This option affects slideshows, and it refers to how smooth or sharp is the transition from one slide to the next one.
Go to the Customizer -> General Settings -> Effects.
Select the value you want from the slider. Smaller values mean a sharper transition from one slide to another, while greater values mean a smoother transition from one slide to another.
![]()
For headings: Highlighted and Rotating
To add effects for headings, click inside the element you want to modify (heading1), and open, in Customizer, the Style tab corresponding to that heading:

Highlighted element in the heading
Next to Effect Type, select Highlighted from the drop-down menu:
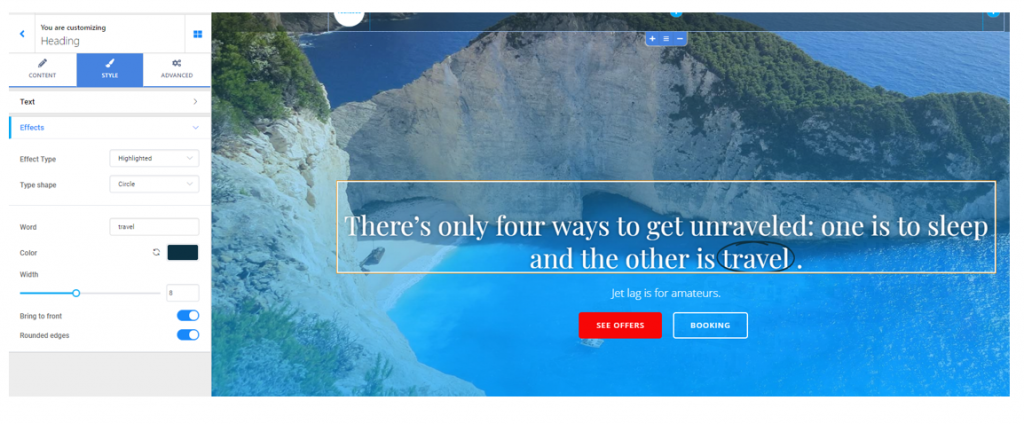
This effect refers to highlighting a word of the heading text, to better focus the attention on it.
- Choose among different shapes for the highlighting element (circle, curly, double, diagonal, etc.)
- You have to specify the word (or the sequence of words) that will be showcased with highlighting: fill in the blank area with the respective word or sequence or words
- Select the color you prefer for the highlighting item
- Select the width of the highlighting item (be it circle, double line, etc.)
- If you enable Bring to front, the highlighting item will appear on top of the word/sequence of words you highlight
- You can make the highlighting item to have rounded edges
Rotating effect in the heading
Next to Effect Type, select Rotating from the drop-down menu:
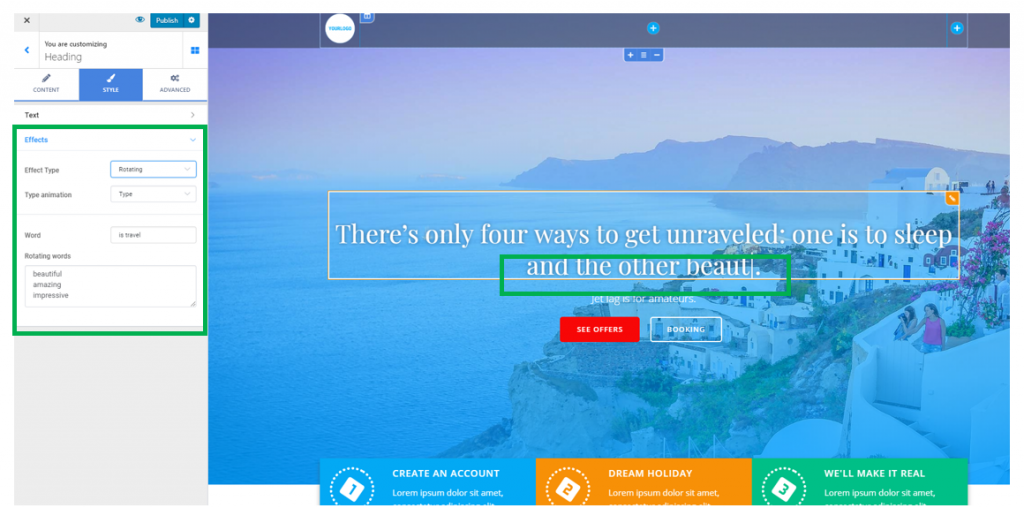
The Rotating effect means a certain portion of the heading text is displayed in a certain type of animation.
The type of animation can vary:
- 3d flip
- Letter flip
- Letter flip vertical
- Slide
- Clip
- Zoom
- Scale
- Push
Try different displays of the portion of text you want to emphasize and choose the animation that best suits the tone of the message in your website.
To create the rotating effect:
- Choose the type of animation you want to use
- Fill in the blank space next to Word, in the Customizer, to designate the word/the sequence of words that will be part of the animation
- Fill in the blank space next to Rotating words, in the Customizer, with alternative words/sequence of words that will replace the initial word/expression, in a sequence of heading variations
For simple text: text shadow
This effect is available for any text in the website, only you have to customize the options individually, for each text you want to modify.
This effect concerns simple text of any section in a page. Click inside the text box, and open, in Customizer, the list of settings corresponding to that text.
Click on the Advanced tab -> Text Shadow:
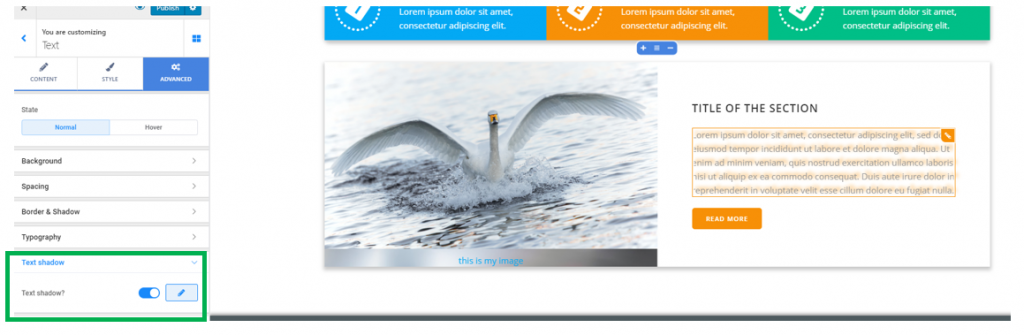
Enable the option to show a text shadow and click on the pencil icon next to it, to expand the list of customization options for the text shadow:
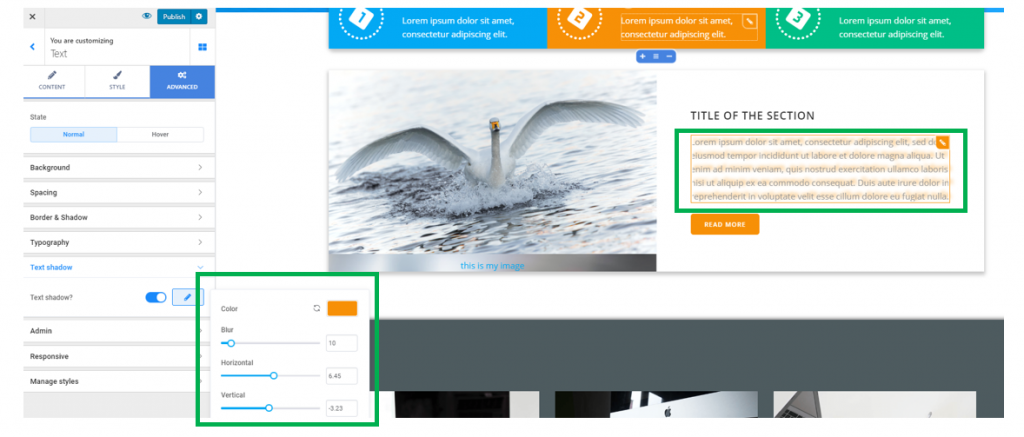
- Select a color for the text shadow, from the color picker
- Create a slighter or more pronounced blur effect, by selecting smaller or higher values on the slider
- Define the horizontal distance over which the shadow effect deploys
- Define the vertical distance over which the shadow effect deploys
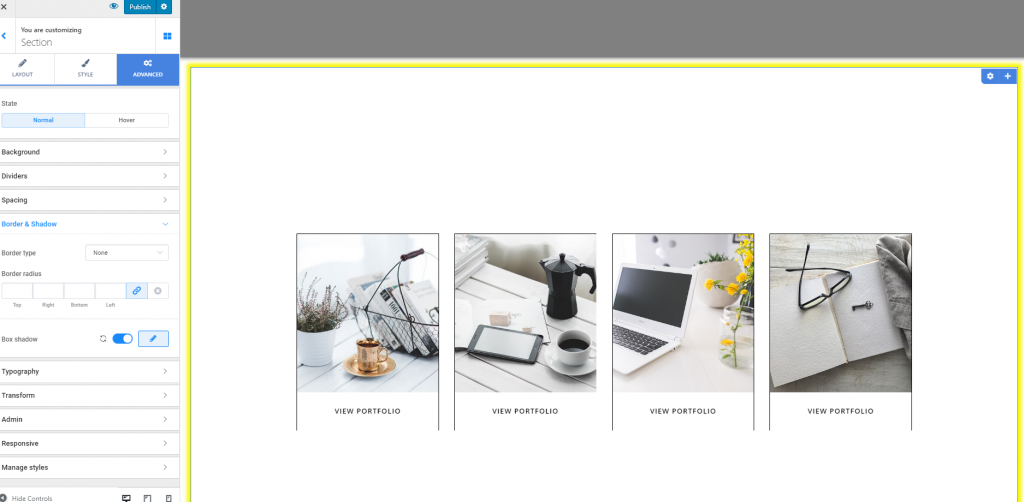
For sections: box shadow
This effect is available for any section in a page, only you have to customize its options individually, for each section you want to modify.
This refers to a shadow effect added to a whole content box.
Select the content section for which you want a shadow effect and click inside it. Thus, you’ll open, in the Customizer, the list of settings for that section.
Click on the Advanced tab -> Border & Shadow.
At the end of the settings subsection, you’ll find the option to enable Box Shadow.
Note: the box shadow will not be visible unless you set the margins of the box to values that are greater than 0 (from Spacing Options).
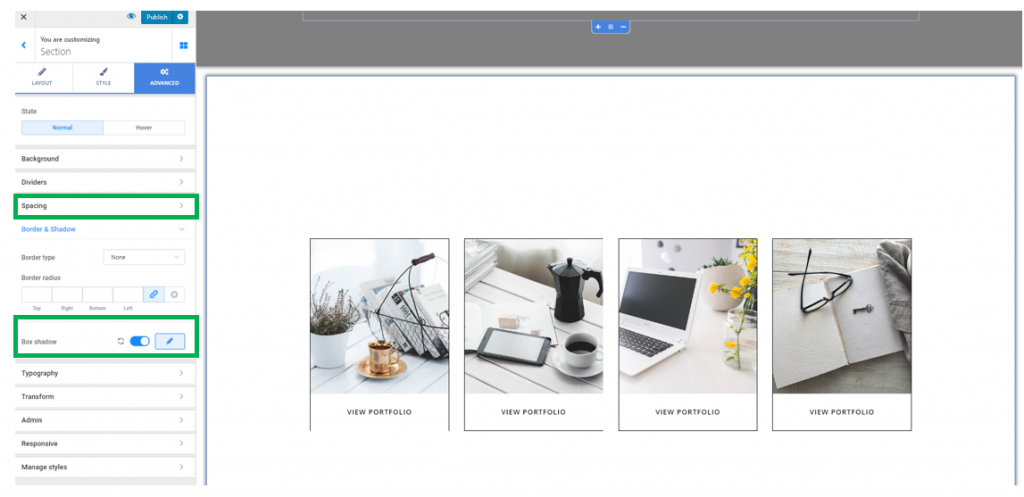
Enable the option to Show a Box Shadow and click on the pencil icon next to it to open the panel where you’ll customize the box shadow:
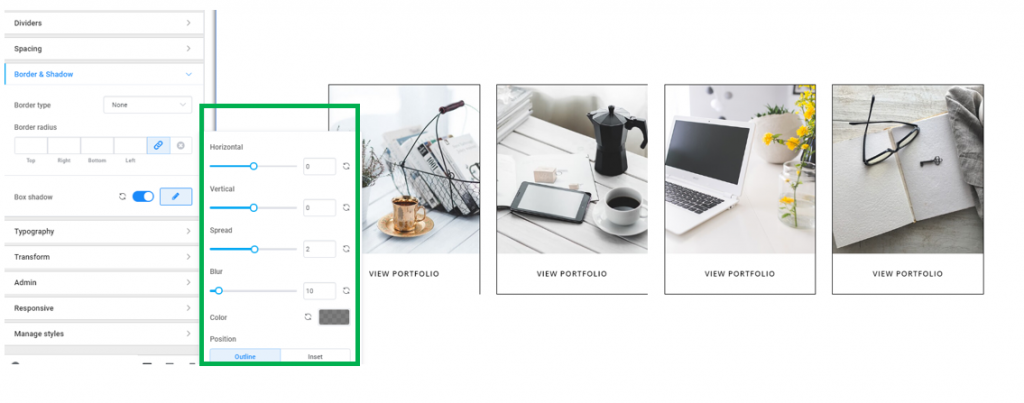
- Set the horizontal distance over which the box shadow deploys
- Set the vertical distance over which the box shadow deploys
- Set the space the shadow occupies, in continuing the content box
- Apply a slighter or more pronounced blur effect to the shadow
- Select a color for the box shadow, from the color picker
Below is an example of shadow effect applied to the Portfolio section: