The post thumbnail component serves to adding featured images to your blog posts.
This component is to attach to a blog post.
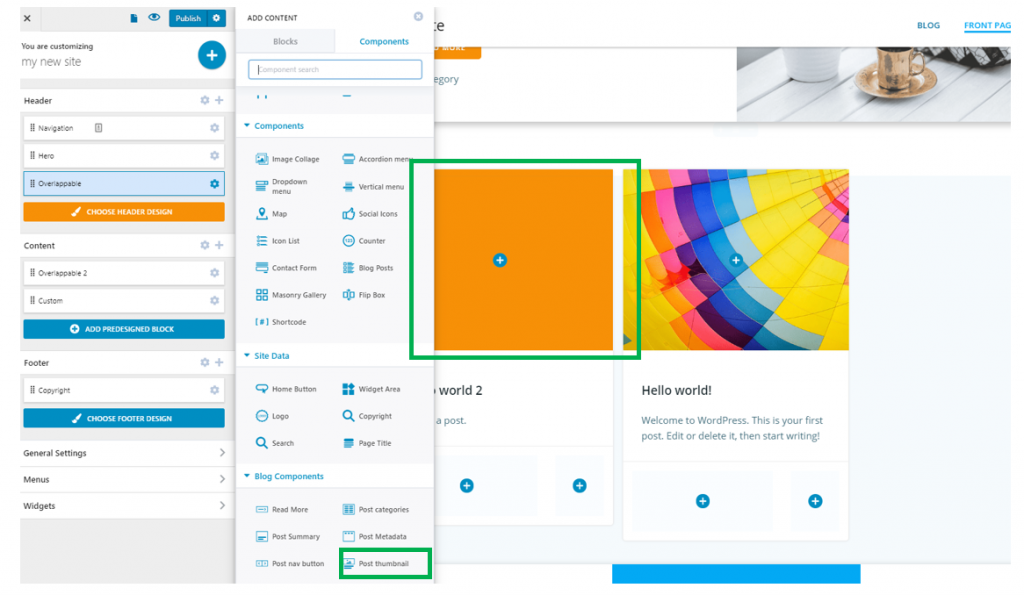
To insert a post thumbnail component into your page and next to a post, please make sure you have the Components list open in Customizer.
To start customizing it, you have to make you have the corresponding settings open in Customizer.
First, you need to add a featured image to a blog, in WordPress Admin Dashboard. Afterwards, you enter the Customizer and start adjusting settings for the post thumbnail.
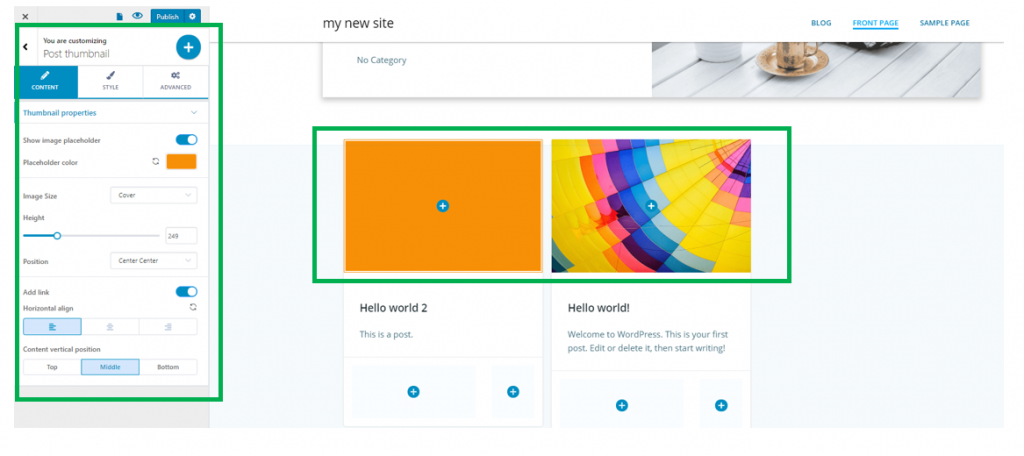
Content
Show image placeholder – if you enable this option, you’ll allow the thumbnail placeholder to be visible, until you add a featured image for the respective post.
Placeholder color – you can give a color to the thumbnail placeholder, by selecting it from the color picker.
Image size – from here, you adjust the image you set as featured for a blog post, to dimensions such as: cover, contain, crop, natural size.
Height – from here, you adjust the height onto which the thumbnail placeholder can expand within the page. The larger the values, the taller the placeholder thumbnail will be.
Positioning of the thumbnail placeholder – from here, you decide upon the positioning of the thumbnail placeholder. The values are: top left, top center, top right, center left, center center, center right, bottom left, bottom center, bottom right.
Add link – enabling this option allows you to place a link onto the thumbnail placeholder, so when users click ono it, they will be led to the complete article in the blog.
Horizontal align – the alignment of the thumbnail placeholder can be set to the left, at the center or to the right.
Content Vertical Position – this refers to the content (featured image) vertical position, that is the vertical distance onto which the image is deployed. The values can be set to the top, in the middle or to the bottom.
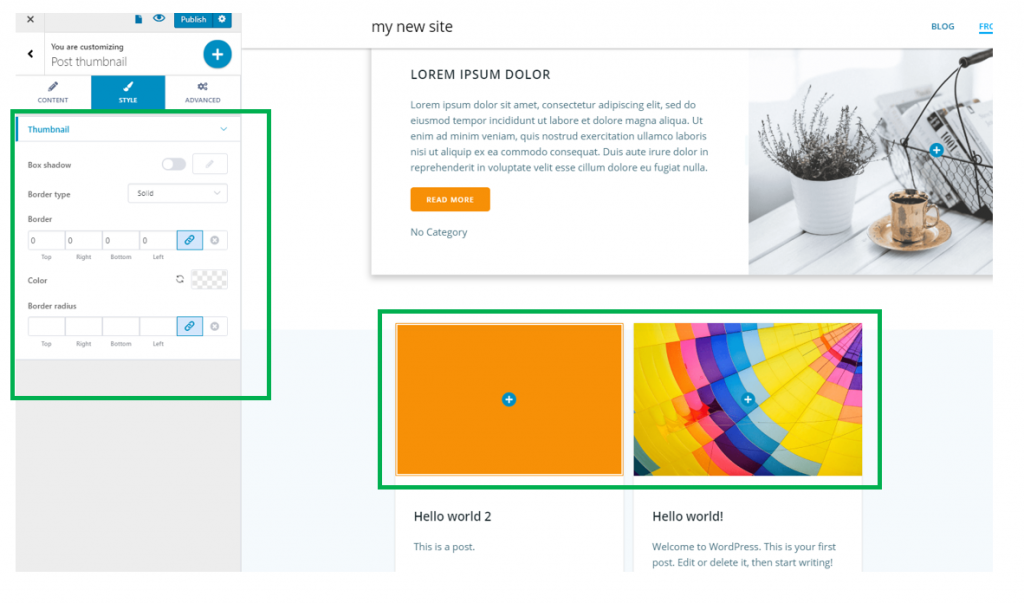
Style
Regarding the style of the post thumbnail, you have the following options:
Box shadow – you apply a shadow to the box delimiting the thumbnail placeholder. If you enable this option, click on the pencil icon next to it, to open the panel with customization options: horizontal/vertical distance to which the shadow is deployed, spread (the surface onto which the shadow is spread), blur – you can apply a slight or more accentuated blur effect to the shadow, color – you give a specific color to the shadow.
Border type – to make a visible border for the thumbnail placeholder, you have to select a border type other than none: solid, dashed, dotted, double, groove, etc.
Border thickness – for the border to be visible, you also have to give its sides values that are greater than 0, for the border thickness.
Border color – select a color from the color picker, for the border of the thumbnail placeholder.
Border radius – greater values mean rounder corners for the border of the thumbnail placeholder. Decide how round the corners will be.